Leaf Prints in Clay

I wasn’t planning on doing clay this week, but of course being open to an emergent curriculum means tossing my plan out the window if necessary. Last week I had many requests for working with clay again and I wanted to honor those requests and let the kids continue to explore clay in different ways. This time I offered them a red firing clay (as opposed to the white modeling clay), which is much softer and a little grainy. I first gave them some time to get to know this clay with familiar tools.


After a bit of exploration, I brought out a variety of leaves and demonstrated how to make a leaf print (explaining that it is similar to making a print with paper and paint- which they are experts in!)


The leaf printing was very exciting for about 5 minutes! Then the kids began to gather paint, glue and other materials to use with their clay.


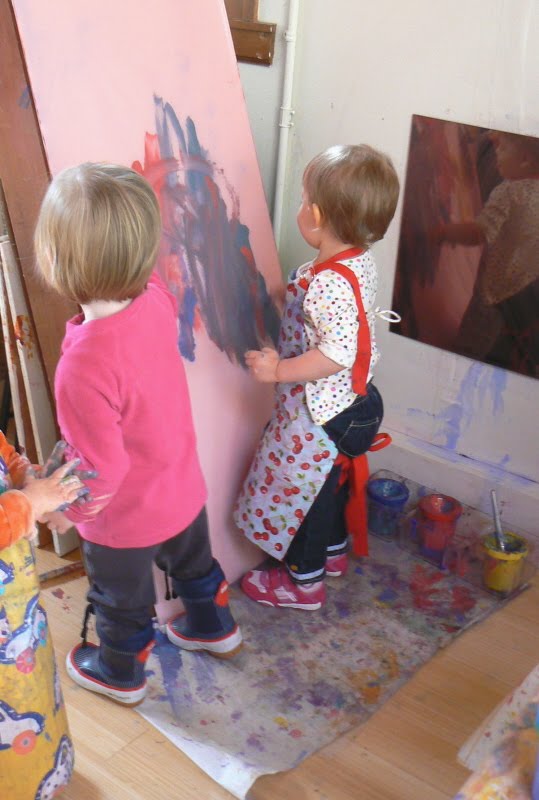
Eventually, the easels were visited as the kids moved around the studio.


Some of the kids brought scissors to their clay work and learned how to cut the clay!

After working with the clay, the older class decided to work with markers on the floor. When some of them began to draw faces, I offered them hand mirrors to see the details of their own faces like we did with our self-portraits.


Sometimes when we wash up outside, the kids request the spray bottles…

Some of the finished clay work

Clay and Monoprint Cards

We began our first summer session working with clay. I gave each child a slab of clay and plenty of tools to explore and manipulate this cold, pliable material.


After working for a little while with the tools, I offered the children cups of water and sponges to moisten their clay. I showed them how the clay can easily dry out and how a little water can soften it right up again.

Of course everyone wanted much more than just a little water, so I offered them squeeze bottles to fill the cups themselves.
The slippery feeling of water on clay captured their attention for quite a while!
Because Father’s Day is coming up, I thought it would be fun to make gifts out of our clay work for all the dads. After much exploration, it was time to decorate the work- so I brought out some decorating items that dads might appreciate… screws (with flat ends for safety), nuts, washers, buttons, and shells. The kids had fun sticking these materials into the clay for their dads.
And some children even brought out paint to add to their creations.
Taking a break from their clay work, some of the kids worked on paintings at the easels.


To make Father’s Day cards, I brought out materials for making monoprints- just like we did here for Valentines Day. The children rolled out paint on acrylic boxes, drew a design with a cotton swab, then pressed a folded piece of paper down onto the design to make a print.
A sneak peek at the final results!

Happy Fathers Day!

Cake-Making with Clay

After last week, when our paper mache project quickly turned into an afternoon of cake-making, I realized that this was the perfect opportunity to explore the use of an emergent curriculum in my art classes. For this group, I reflected on the children’s interest in cake-making and decided to steer the curriculum in that direction for the following week.
So rather than making suncatchers, as the other groups did, I chose to offer this group a clay medium to expand on the idea of cake-making.
I gave each child a lump of clay (and a few smaller pieces that were easier to work with) and set out a tray of various clay tools on the table. I also offered each child a bowl of water and a sponge to use for moistening their clay. We initially talked about their previous cakes that they made and how that inspired me to collect new cake-making items for this class. I showed the kids a few techniques, but they mostly experimented on their own, learning about the tools and the different properties of the clay.


After I gave the kids a chance to get to know the clay, I brought out some more cake-making items: paper baking cups, glue, glitter, sand, and little “treasures” (rhinestones, buttons and sequins).


Towards the end of class the kids began to move around the studio, working on some new easel projects. For this easel, I cut up a variety of colored tape and placed them onto the tray under a piece of paper to make a tape collage.
Another sticky collage, this easel is set up with clear contact paper and collage materials. Just press and stick- A fun way to end the day!

Getting to know Clay

After two weeks of collage, the children are ready for a new 3-D art experience. They were each given a slab of clay and tools to work with. As you can see in this photo, they are all curious about these dense, pliable, cold lumps in front of them. Logan and Rogan were particularly interested in poking the clay with the tools and making “holes.”

Austin immediately began to cut the clay, back and forth, with a knife-like tool.
Soon I brought out bowls of water and sponges for the children to use on their clay. They were excited about the water and repeatedly asked for more. When I gave them more water from my squeeze bottle, Logan asked to do it himself. Then I brought out two more bottles and offered them to the other kids. Of course they were all interested!

Eventually, I brought out the collage materials from the last two weeks and offered them to the children to use with their clay.


Off they go to the easels!
Rogan experiments with finger painting on the acrylic easel.
Logan is working out how to squeeze the water onto the easel.
A messy class is a successful class!

A new medium

Our 3-D art experience now takes us into the world of clay! Clay is a challenging medium. It is very dense and hard to manipulate with young hands, but once a child becomes familiar with clay, it is very intriguing! Clay comes from the earth- it is cold and smooth and can quickly change consistency by adding water or letting it dry. For such a young group of children, I have found that they are more willing to experiment with the clay if they have interesting tools to use. I gave each child a slab of clay and offered them a range of tools- popsicle sticks, combs, necklaces, rolling pins, plastic horses and cars.
Grace first pokes her clay with popsicle sticks.
Kate’s grandmother, Sylvia, shows Kate and Kirsten how the tool can cut the clay.
Soon I brought each child a sponge, spoon, and a small bowl of water to use on their clay. Kirsten put a piece of clay directly into the bowl of water, making it very slippery. She seems to be squeezing the sponge with great force!
Karuna uses the spoon to try to scoop the clay.
After the children had some time to work with the clay, I brought out the collage materials. The shells, macaroni, and beans are great for pressing into the clay for decoration.
Soon the kids were moving around looking to find some paint to get into.

During class, Grace left to get a diaper change. The other girls watched out the window, very concerned about where their friend had gone.
Back to the table for more exploration!
Painting will never get old!

Clay!

This week I introduced clay to the children. None of them had any experience with clay, so it was very interesting to see how they approached it. I started them off with slabs of clay for them to touch, poke and handle. There was a little poking going on, but they seemed reluctant to handle the clay. Then I offered them tools to use on the clay… the usual clay tools: rolling pins and carving utensils- and of course cars, horses, necklaces, and combs!The combs and cars were great for making tracks in the clay.

I also gave each child a small bowl of water and a sponge to moisten their clay if it seemed dry. This made the clay more pliable and very slippery!

After working with the tools, I brought out the bin of collage materials from the previous week for the children to stick into the clay.
Soon, Jordan and Karuna moved to the easel to work on monoprints.

Richie was still very focused on the cars!

After some movement around the studio, the kids came back to their clay to continue working. It’s always important for any artist to be able to take a break and then re-visit their work with a fresh perspective. What great artists!