Awesome Wall Organizer

Urbio Wall Organizer

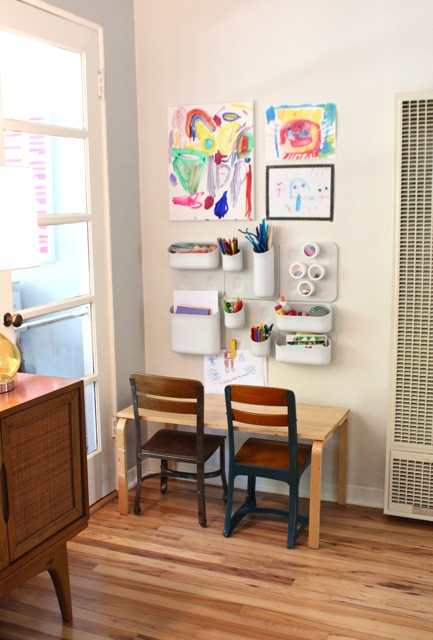
Our art pantry sits in a corner of our living room, inviting Karuna to create whenever inspiration strikes. This little area is squeezed between a door and our wall heater and has just enough room for a table and a few narrow wall shelves.  I couldn’t find a table that would fit this awkward space, so I made one using a piece of wood and legs from an Ikea stool.
For nearly two years she used this space often, but neither of us could figure out how to keep it organized!  With most of her supplies stored on top of the table, it just encouraged more junk to pile up. Here’s what it looked like on a good day and on a bad day:

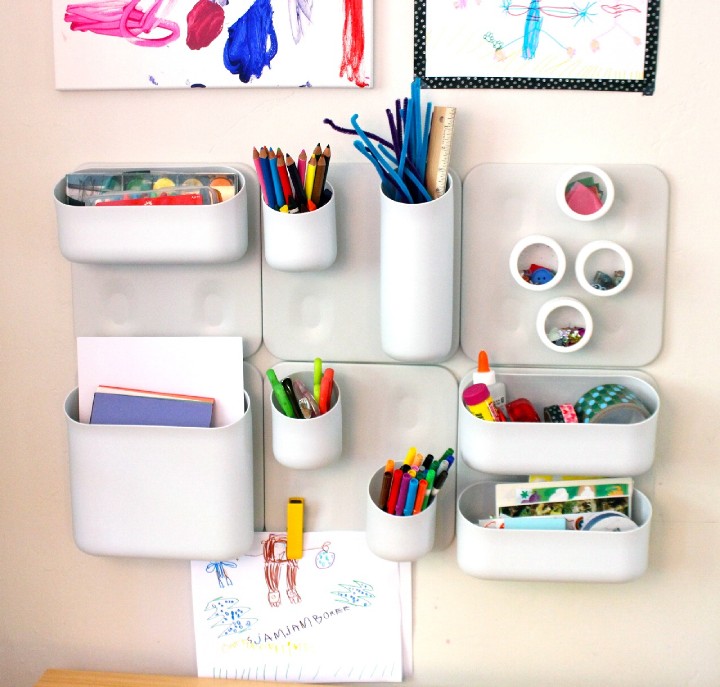
Then one day, I discovered Urbio! It’s a wall storage system, originally made for houseplants. With metal plates and strong magnetic cups, it looked like it might be the perfect solution.  Since this art space is in my living room (and it’s what you see when you walk in the front door), I was more inclined to splurge on this product. The design is super simple and sleek and I felt that if it functioned well, it would be totally worth it.
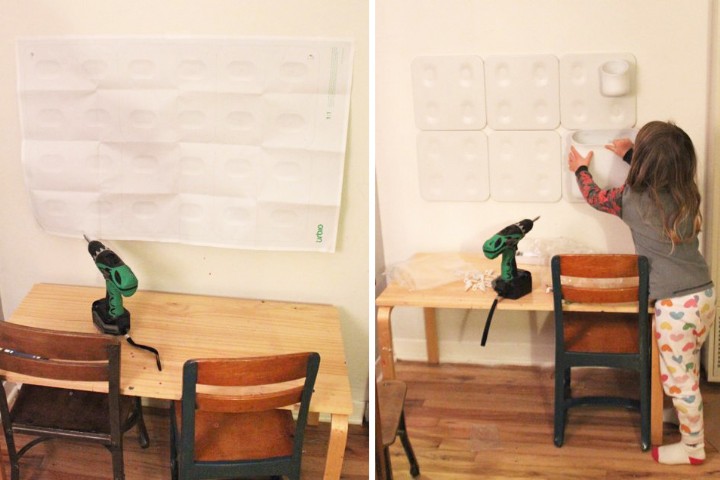
Here’s a snapshot of the easy installation process and Karuna testing out the strength of the magnets:

With this new organization, Karuna began to use her art space even more and actually made the effort to put everything away on her own!  The added bonus was when little sis, Ora, began to walk, she couldn’t reach any of the supplies. Too bad for her, but awesome for us.


(Update: Urbio has come out with a new, less expensive version called Perch. You can see it here.)

Save

Perler Bead Display

Perler/Hama Bead Display

Perler beads (AKA Hama or Fuse beads) are awesome. They are great for fine motor skills and hand-eye coordination. Karuna would come home with one of these a day from preschool. Her whole class was obsessed! As you can imagine, by the end of the year we had a large bag full of these creations. Rather than stuff them into a drawer, never to be seen again, we found a way to display them!
To make them gallery ready, arrange them onto a nice canvas, then attach them with a glue gun. We used a linen canvas, but you could also paint a white canvas for a fun background color.

Here are some other ideas to display Perler beads:
Make a mobile out of them
Attach a jump-ring to the top of one and use as a necklace pendant
Attach to the front of a greeting card
You could also make them into ornaments, magnets, or use them as coasters!

What do you do with your Perler bead creations?

Interview with Tiffany Shlain

Meet Tiffany Shlain!

Tiffany Shlain is a mother of two, acclaimed filmmaker, writer, founder of The Webby Awards, and co-founder of the International Academy of Digital Arts and Sciences. She lives in the San Francisco Bay Area with her husband, Ken Goldburg, and her two daughters, Odessa (10) and Blooma (4). Tiffany and her family exude creativity and are always cooking up fun, artful ideas- from cardboard sculptures to wacky house parties! I recently visited Tiffany and her daughters at home to check out their art pantry and find out a little more about the importance of art in their lives.

Read More

Duct Tape Cell Phone Case For Dad

DIY Phone Case with Duct tape

As the girls work on their Father’s Day art projects, I decided that I wanted to make my own gift for my hubby for Father’s Day. With duct tape being all the rage these days, I wanted to experiment with this fun medium and see what I could come up with.  Here’s how I made a duct tape cell phone case with a photo holder (a great way to showcase your kid’s artwork too!).

What you’ll need

  • Duct tape (one or more colors, depending on your design)
  • Scissors
  • Clear plastic bag (freezer zip locks work well)

Steps

1) Start by layering three or four pieces of tape together, sticky side up, to make one large piece. The height and length depends on the size of your phone. Make sure it’s at least an inch taller than your phone and a little more than double the width (you can always cut it down later if it’s too large).
Then do the same thing, sticky side down, over your first piece. You will end up with a double-sided large rectangle of duct tape.

2) Cut a piece of tape the same length as the height of your rectangle and stick it along the side edge- with half of it hanging off.
3) Fold this side of the rectangle over your phone so that there is a strip of the sticky edge facing up.
Fold the other side over to fit snugly around the phone and press down so that it sticks to the strip of extra tape.
4) To seal this side, cut a new strip of tape and place it over the seam. If there is extra tape, you can fold it towards the inside or cut it off.

5) To close off the bottom of the case, fold the corners in, like you are wrapping a gift and seal it with a new piece of tape.

6) To make a picture slot, cut out a piece of plastic from your baggie, a little bit smaller than the front of your case.
7) Cut out four thin strips (about ½ in wide) of tape for the edges of your plastic window.
Use one strip to fold over the top of your window.
8) Place the window over your case and secure it on the sides and bottom with the thin strips of tape (so that half sticks to the window and half hangs over to stick to the case).

9) Now for the extra special touch… just cut a photo or a piece of your child’s artwork to size and slip it under the window.
So cute, I might just have to make a second one for myself!

Save